Here are the instructions & video tutorial for an easy, safe, fun project to do with your little ones to make something special this Father’s Day.
We are going to be making SALT DOUGH to craft easy keychains or magnets for Dad this year! Scroll down below the video for detailed instructions.
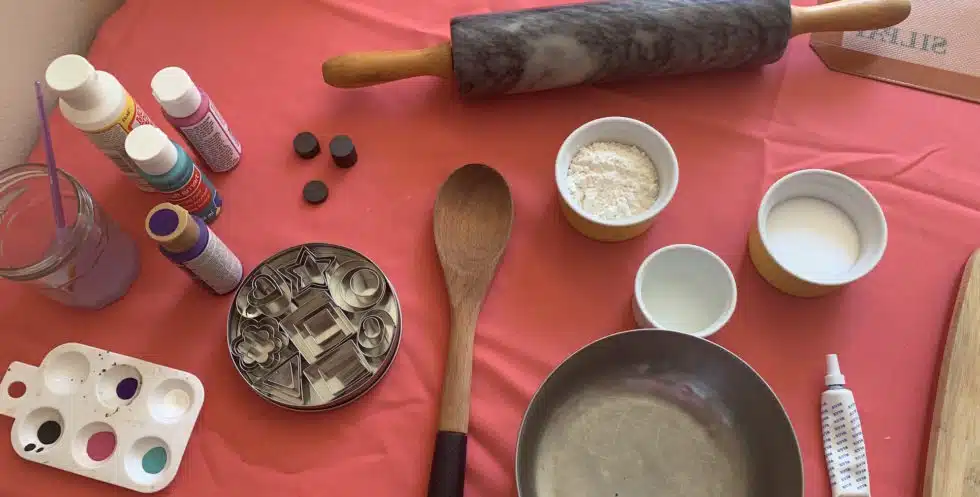
Required Ingredients For Salt Dough
- One part Salt (~¼ cup)
- One part Flour (~¼ cup)
- Half part Warm Water (~⅛ cup)
- Modge Podge (or other sealant) at the end
Optional Ingredients To Make Salt Dough
- A few drops of food coloring
- Paint
Required Tools To Craft Keychains or Magnets
- Bowl
- Mixing Spoon
- Flat Surface
- Paintbrush
- Hardware (either magnet or keychain)
Optional Tools To Craft Keychains
- Rolling Pin
- Cookie Cutters
- Pencil
- Baking Sheet
- Oven
Additional Read: Thanksgiving Art – Apple Pie Spice Paper Bag Pumpkins!
Part One – Make the Dough
Combine ingredients together to form the base of the craft
- In a bowl, add equal parts flour and salt and stir until combined.
- Add half part water around the dry ingredients. Optional: Add a few drops of food coloring to color the whole dough.
- Use a spoon to mix until all ingredients come together. It will be crumbly at first. Stirring is really fun to the little ones to see it come together!
- Once it starts coming together, use your hands to combine, take the dough out of the bowl and knead with your hands until it feels malleable and not-too-sticky. If your dough is too crumbly, add a LITTLE water; if it’s too sticky, add a LITTLE flour.
Part Two – Shape the Dough
Once it’s easy to work with, form the dough into your desired shape. This can be accomplished two different ways:
- Shape it like you would play dough using your hands. You can use your hand to flatten it – too thick and it takes longer to dry- and test your little ones’ fine motor skills to shape it out.
- Use your rolling pin to flatten it to about ¼ in. thickness – too thin and it will be easy to crack – and then use cookie cutters to get the shape you want.
- If you are making a keychain, use a pencil or the bottom of a thin paintbrush to add a little hole for the hardware.
Part 3 – Drying it out
Once it’s shaped, the dough has to harden completely in order to be used as a keepsake. There are also two ways to dry it out:
- Let it harden overnight. Leave it out on a dry countertop until the next morning. If they’ve been out for hours already, flip them before going to bed so that both sides get air time.
- Heat your oven to ~200°F. Put your shapes on a baking tray and place in the oven for 2-3 hours flipping halfway through. Let them cool completely.
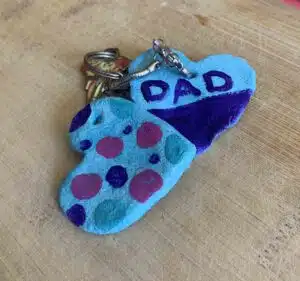
Part 4 – Decorate It To Make A Keychain or Magnet!
Make it your own!
- Totally optional, but to add a little more fun and individuality, paint your shapes with lots of fun colors, designs, and messages for dad!
- Once your paint has dried, use modge-podge or other sealant to finish your project. Paint it all around to cover the entire object. This will make another barrier against breaking.
- Once set, finish your project by gluing a magnet to the back or stringing a key-ring through the hole!
Additional Read: Amazing Art Projects: No Shopping Needed!
