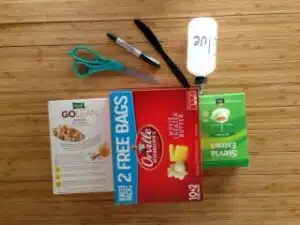
Materials:
Cereal box circles
Glue (glue stick or craft glue)
Marker
Scissors
Popsicle Sticks, Plastic Knife, Straw or Wooden Skewer
1. I set out all of my cut circles and began layering to create colorful little turkeys, not gluing until I was satisfied with the overall appearance.
Experiment with the front and backsides of the cereal boxes, patterns and solids, so as not to have too many competing patterns or like colors on top of each other!
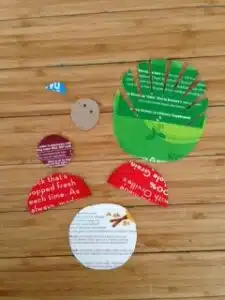
2. Place a large circle in back, cutting off the bottom and making slits around the rest to form the tail feathers.
3. Choose smaller circles for the body, one or layer two. Cut one circle in half for the wings. Use the smallest circles for the head and wattle.
When searching for the anatomically correct term for the wattle it surprised me to see how many people have googled “What’s the name for that red dangly thing on a turkey’s neck?”
4. Draw little eyes and add a cardboard beak.
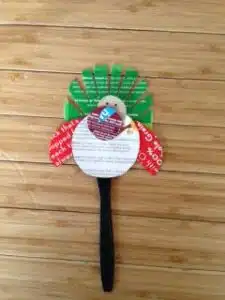
5. Once you’re satisfied with your design, glue.
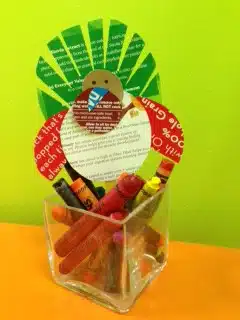
6. Glue a stick on the back and poke your turkey into a plant, centerpiece, bowl of candy or cranberries, your baked sweet potatoes or wherever you wish.
Make a bunch for an all turkey centerpiece, or even add titles for food dish markers. Your kiddos can help with each step or just enjoy the finished turkey product!